Howdy!
Lately I have been crafting up a storm. Yesterday, I bought some glass candle holders with the intention of making some coasters. I had no idea what to do with them other than maybe paint them. But then, looking over my supplies, inspiration struck! I saw all my sprinkles, and thought some sprinkle coasters would be a funky addition to my glass collection.
So here is a tutorial for how to make these fun coasters!
You will need:
- Glass candle plates (any shape is great, I used square - just make sure they have a lip around the edge of at least 1cm or 3/8 inches, and that they're big enough to put a glass on top of!)
- Sprinkles - any colors you like!
- Resin - I used Gedeo Crystal Resin
- Plastic cups for mixing resin
- Wooden stir stick for mixing resin
- Vinyl or latex gloves
- Tray
- Wax paper or aluminum foil
My glass candle plates, pre-sprinkles.
Crystal Resin comes in two parts - the resin and a hardener.
Use any sprinkles you like! I found specialty sprinkles in the cake decorating section at Michael's.
Step 1: Put on your gloves. Clean the glass plates with rubbing alcohol to remove dirt and finger prints, and leave to dry (about 10 minutes).
Step 2: Resin only activates when you mix it with the hardener. The brand of resin that I use requires two parts resin to one part hardener, so I poured 3 oz of resin and 1.5 oz of hardener. You may need more or less resin depending on how many coasters you are making and how high the lip is on the glass plate. If you have extra resin at the end, make some sprinkle pendants using an old ice cube tray!
Step 3: Stir the resin with the wooden stir stick until it becomes clear. It may take a few minutes of stirring and you might create a lot of bubbles, but don't worry about that!
Step 4: Put your clean glass plates onto a tray covered in wax paper or aluminum foil (in case of spills). Don't use a tray that you use for food or that you would be upset about if it got some resin on it. Pour resin to about halfway the height of the candle plate.
Step 5: Pour a bunch of sprinkles in! Not too many - just add a bit at a time and mix it as you go, until you get a nice even coverage of the plate. Here I am using a pre-mixed rainbow non-pareil sprinkle mixture.
Step 6: Pour resin slowly on top of the sprinkles until you reach almost to the top of the lip. If you overpour, you will get a resin spill, (not fun)! You may need to stir and even out the sprinkles a little bit after adding this resin.
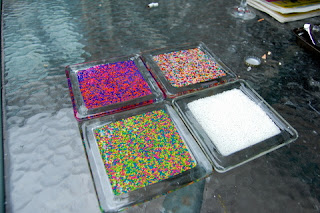
Step 7: Repeat Steps 4-6 for your remaining coasters. I chose to make 4 different coasters, but you can do the same for each of course! This one is a neon mix with blue, green, yellow and pink.
This one is pure white sprinkles! This might be a lovely wedding craft.
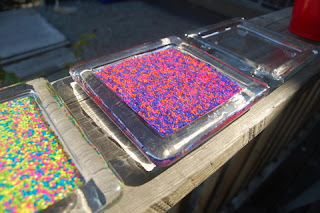
This one is a pink, purple, and orange mix!
Step 8: Place your tray in a safe, warm spot in your house, where your kids or pets cannot get to it. It is very important that the tray lays completely flat, or your coasters will be lopsided. Some people like to put a box on top/around the tray to prevent dust from settling onto the resin.
Step 9: Wait 12 hours. Then, look and see if your coasters need topping up. One of my coasters had sprinkles poking through so I mixed up a small batch of resin to coat these to ensure a flat surface.
Step 10: Wait at least 24 hours after this (if using Gedeo Crystal Resin), bare minimum, before using your coasters! If you are using a different brand of resin, check the drying times with your instruction sheet and add 6-12 hours. You want to be really sure that the resin is completely dry and hard before placing beverages on top of the coaster.
Step 11: Invite friends over, and pour some drinks!


So fun!!!!!!!!! Thanks for the tutorial babes!
ReplyDeletexoxo,
http://icycrystalgalleria.blogspot.ca/
Cindy
This is soo creative! I love it:)
ReplyDeleteThese are so cute :) !! Can't wait to see your other crafts :)
ReplyDeleteThese are soooo cute!
ReplyDeletesuper cute and creative! love how colorful it is. thanks!
ReplyDeleteThese are adorable
ReplyDeletegl0ssi.blogspot.ca
They looks fantastic, I might have to try this :)
ReplyDeletewww.ofbeautyandnothingness.blogspot.co.uk
this is so creative! i love the gif images to show what you did!
ReplyDeleteI actually just recently started blogging...a week ago haha lol check it out when you have time <3
brokeanddbeautiful.blogspot.ca